Skip the guesswork. Here’s everything you need to plan, power, and install your Everbright—no matter who’s handling it.
Power Control Options
The Everbright must be powered off at the end of each day (for at least a few minutes) to prevent issues. It does not have a built-in power switch, so choose one of the following:
1. Wall Switch (Recommended)
A standard light switch that controls the outlet powering your Everbright. Accessible to staff, not obvious to the public.
2. Circuit-Level Timer
Automatically turns power off and on at pre-set times. Great for spaces with consistent hours.
3. Wireless Wall Switch (No Electrician Required. $600 Add-On)
Don’t want to hire an electrician? We can include a remote wall switch that looks and functions like a traditional light switch. Mounts anywhere. No wiring required. Must be ordered prior to shipping.
Installation Steps
1. Choose Your Location & Mounting Height
Use the Mounting Height Guide to determine the ideal placement.
2. Install a 120V Electrical Outlet
- Does not require a dedicated circuit if it supports 6–10 amps
- Should be positioned according to the cleat diagram for clean mounting
3. Install a Switch to Control Power
- Required unless you purchase the wireless switch
- Can be manual or timer-based
4. Install the French Cleat (Included)
Secure to the wall using appropriate anchors for your wall type.
5. Mount & Power On
- Plug it in
- Hang it on the cleat
- Power it on
You’re ready.
Best Practices for Installation
Electrical Setup
- Power source must be turned off nightly
- Use a switch that staff can access
Mounting & Clearance
- Can be surface-mounted using the French cleat
- If recessed, allow a minimum of 6″ of clearance on both the top and bottom, for ventilation and mounting
Crating & Shipping
- Ships professionally crated via priority freight
- Includes tracking and scheduled delivery window
Unpacking & Setup
- Have two sturdy dollies on hand
- Uncrate near the installation area
- Always lift from the bottom and sides (not the front)
Owner Manuals & User Guides (All Sizes):
Documentation by Size
Everbright Classic (~8 feet long, 4 feet high)
Planning Installation:
Everbright Mini (~4.3 feet long and 4 feet high)
Planning Installation:
The Everbright Long (~8 feet long and 2.5 feet high)
Planning Installation:
Visual Installation Guide
Before installation, consider your space and how the Everbright will be used:
- The Everbright can be surface-mounted using the included French cleat or recessed into a wall.
- If recessing the unit, ensure at least 6 inches of clearance on the top and bottom for ventilation for long-term performance.
Dreaming Bigger?
If you’re in early-stage construction, you may have the opportunity to design a built-in alcove with rear access, allowing for:
✅ A fully flush installation
✅ Easy servicing from the back
✅ A hidden power connection
Three examples:
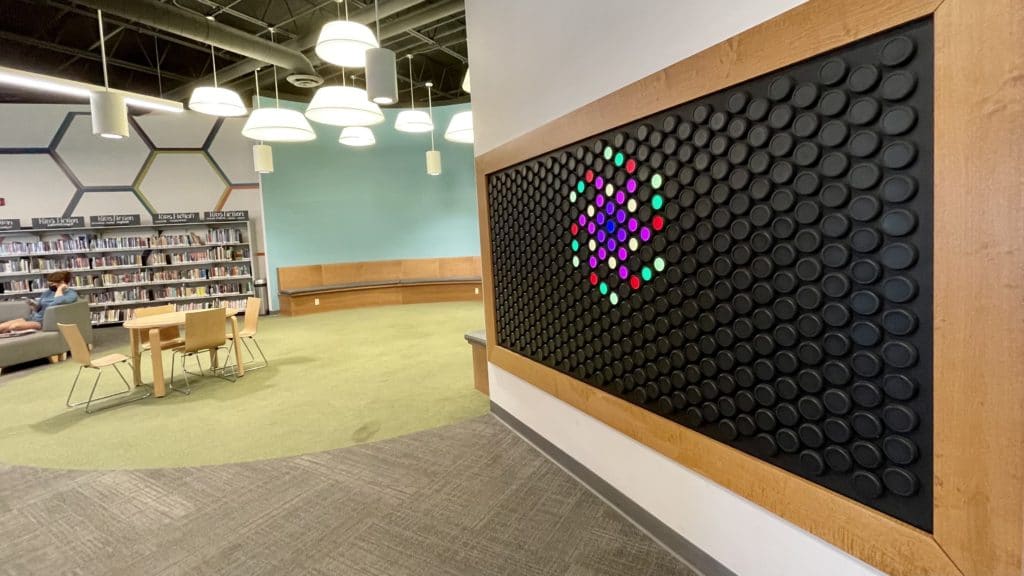

See photos and examples of Everbrights installed in:
- Recessed feature walls
- Interactive museum exhibits
- Pediatric lobbies
- Early childhood spaces
Need help planning? Book a 15-minute call with Kelly Parkinson →