How does the Everbright install?
Installation guide
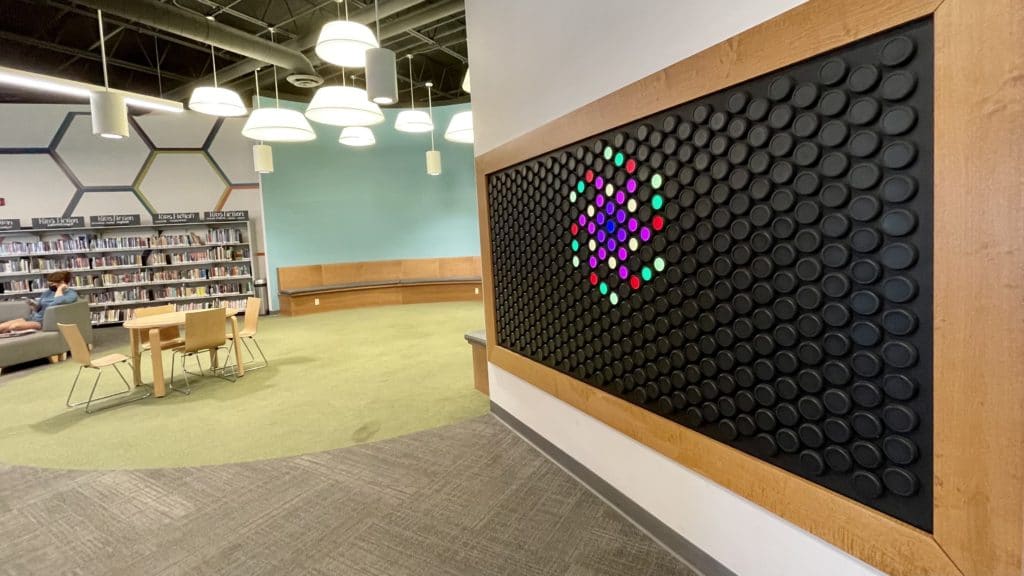
The Everbright is designed for a straightforward, secure installation using a French cleat system (included). While it does not require external connections beyond a standard electrical outlet, proper planning ensures a smooth, seamless experience.
1. Electrical Setup: Plan for a Dedicated Power Switch
The Everbright does not come with a power switch—we recommend installing a dedicated electrical switch to control power to the outlet.
- The switch should be accessible to staff but not to the public. While users can reset their designs via the function buttons, we don’t want frequent power cycling throughout the day.
- Ensure power is turned off nightly to maintain optimal performance over time.
🔗 Need electrical and mounting diagrams? Visit the Documentation Page
2. Planning Your Installation
Before installation, consider your space and how the Everbright will be used:
Wall-Mounting & Ventilation Considerations
- The Everbright can be surface-mounted using the included French cleat or recessed into a wall.
- If recessing the unit, ensure at least 6 inches of clearance on the top and bottom for ventilation for long-term performance.
Dreaming Bigger?
If you’re in early-stage construction, you may have the opportunity to design a built-in alcove with rear access, allowing for:
✅ A fully flush installation
✅ Easy servicing from the back
✅ A hidden power connection
Three examples:


3. Crating & Shipping: How Your Everbright Arrives
Each Everbright is professionally crated in a custom plywood shipping crate to ensure safe transport.
🚛 Shipping Process:
✔️ Crated by professionals for secure transport
✔️ Shipped via a freight carrier specializing in sensitive electronics and artwork
✔️ Tracking number & direct contact info provided upon shipment
✔️ Delivery scheduled in advance—carriers will not arrive unannounced
4. Delivery & Unpacking: Be Ready
The Everbright will likely arrive via truck with a liftgate. Inside delivery is typically included, but there are a few key considerations:
Have Two Dollies On Hand
Many freight carriers do not provide dollies, and their pallet jacks may not fit through interior doors. We strongly recommend:
✅ Having two sturdy dollies on hand
✅ Positioning the crate as close as possible to the installation wall before uncrating
✅ Uncrating in position to ensure easy testing before installation
Example dollies that work well: Milwaukee 800-lb Capacity Dolly
5. Handling & Installation: Treat It Like a Baby
While the Everbright is built to last, it contains sensitive electronics and should be handled with care.
⚠️ Critical Handling Guidelines:
- Never apply pressure to the dials—always lift from the bottom and stabilize by holding the sides.
- Never press on the back cover boards.
- Always set it down gently—no sudden drops or rough handling.
- When navigating stairs or tight spaces, use heavy blankets and dollies to cushion and stabilize movement.
Best Practice for Installation
The ideal approach is to:
1. Bring the entire crate inside and position it directly in front of the installation wall.
2. Test the board before installation—plug it in while still in the crate to ensure everything functions properly before mounting. You can fully test your Everbright without removing it from the crate.
3. If moving without the crate, ensure the unit is properly supported during transport.
🔗 For full installation details, mounting specs, and electrical diagrams, visit the Documentation Page.